That Time When I Lost Access to My Server Entirely

There’re always moments in your life where lots of shit start to breakeven at the same times, Last week i have lost access to my home server entirely either via Network or via Monitor(cause i didn’t have one sadly).
In this blog, we’ll drive into a journey of a lifetime where i attempting to recover access to my server via SSH without having Monitor cause i ain’t gonna pay for it
Server-Router-PC Ethernet Connection
Ok First, What to do? I’ll try ethernet to the router then nmap from my PC to find hosts that’s up. Theoretically this should work in most case, since your Router should give local IP Address via DHCP or static IP Address is set on the right subnet

Now with everything connected, we’ll try to find hosts that’s up in the LAN network range with nmap
In this example, LAN IP Address range is 10.10.20.0/24
nmap -sn 10.10.20.0/24

hmm, Sadly didn’t work :<
From this, there’s is a possible cause that
- Server doesn’t configure DHCP
- by looking at
/etc/network/interfaces->iface eth0 inet dhcpshould look like this
- by looking at
But since i didn’t have access to my server, I assumed that this meant server’s network configuration is probably shitbed rn
We’ll look into on a more Nerdies side on the next section
Server-PC Ethernet Connection
Since the old school Server-Router-PC methods doesn’t work on me, we’ll look into on a more advanced methods, which is directly connect Server ↔ PC via ethernet like the graph below

Static
Before we do anything else, start up a packet collection on your PC with WireShark’s dumpcap
dumpcap -i network_interface(eth0 etc.)
Anddddddd look what we got there, the ARP looking for where is 192.168.1.1

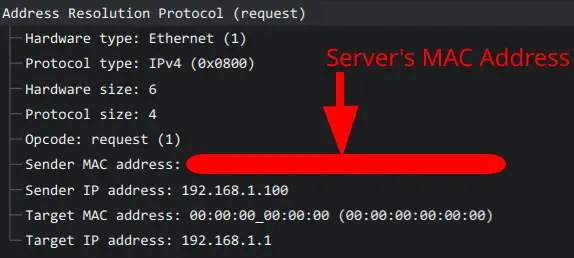
This clearly indicated that my /etc/network/interfaces is likely -> iface eth0 inet static
and full configuration is likely like this
iface eth0 inet static
    address 192.168.1.100
    gateway 192.168.1.1
    . . .
This also explains why Server-PC Ethernet method doesn’t work either, cause the Server doesn’t configured to accept DHCP in the first place!
and also that local IP Address configured in the original /etc/network/interfaces is differ from what the currently router is. Which is another contribution to the problem!
What we do next is simple, simply assign 192.168.1.1 to our PC’s interface and set up routing
ip addr add 192.168.1.1 dev eth0
ip route add default via 192.168.1.1 dev eth0
And it’s work!!

DHCP
Now that I sucessfully restore access to my server, but what if /etc/network/interfaces is configured to only accept DHCP?
iface eth0 inet dhcp
This is more complex than the Static one but let’s see how DHCP works from a graphics below:
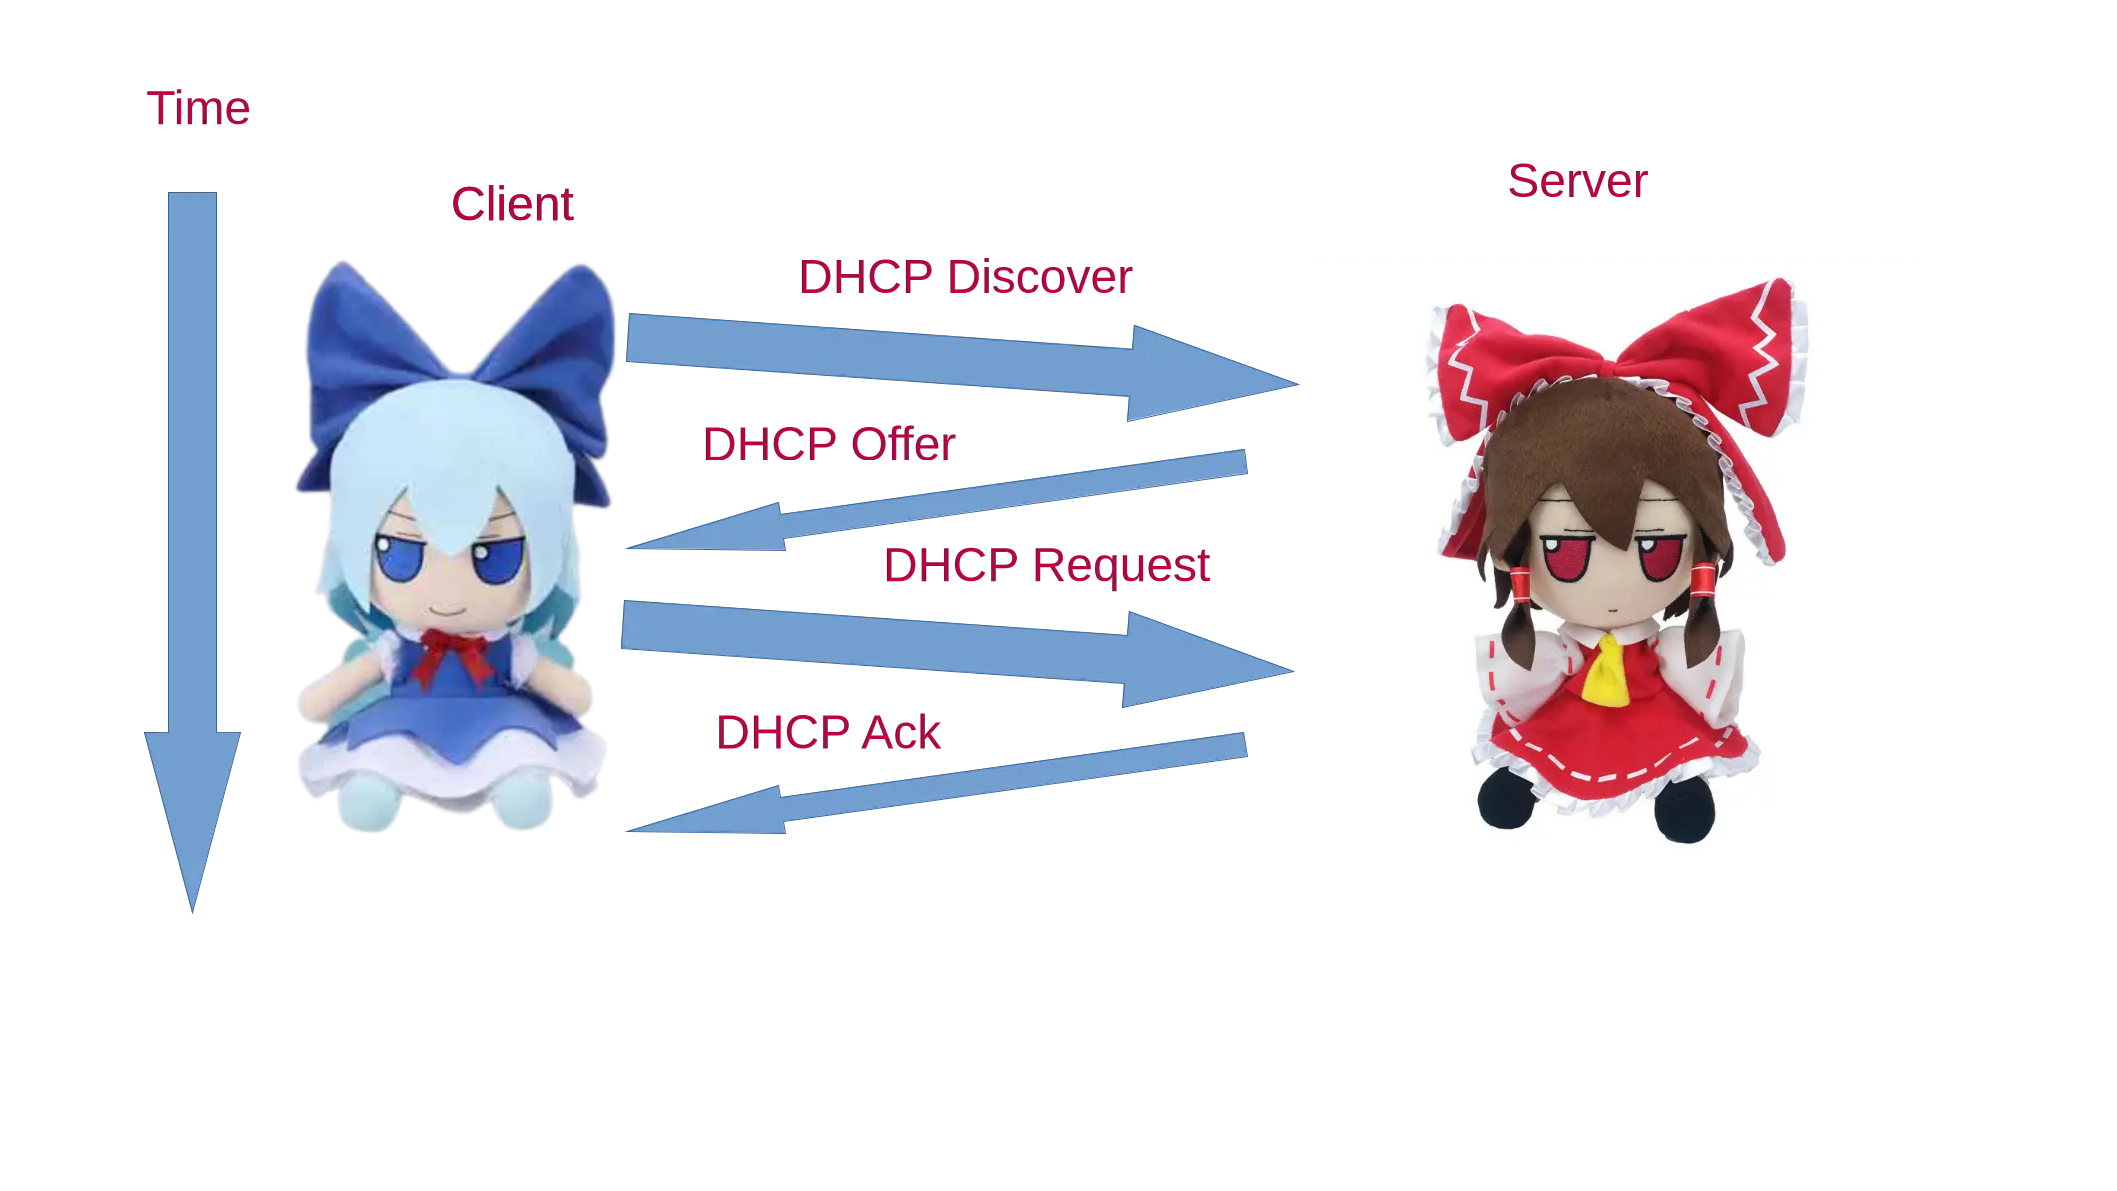
This meant that the Server would annonce the DHCP Discovery on the interface Port 67, and what we need to do is to simulate the DHCP server as it’s simpler than setting up the actual DHCP server on your server so…
After some researching and GPTing I managed to came up with Python script that recreate DHCP packet on our PC side Here
The script setup IP Address as 192.168.1.123, gateway 192.168.1.1
The script flow is it listen on UDP port 67 68 and do as the graphics upper describe, Server announce DHCP Discovery on Port 67, Python resonse with DHCP Offer, then Server response with DHCP Request and Python Response with DHCP ACK…end of the flow
Now Server will configured whatever IP we set in the script as its IP Address. Now what we gonna do is the same as Static one, add IP then setup routing
ip addr add 192.168.1.1 dev network_interface(eth0 etc.)
ip route add 192.168.1.0/24 via 192.168.1.1 dev network_interface(eth0 etc.)
And it’s working!!!

WireShark Excerpt on Packet activities on interfaces:

If detect nothing at all on WireShark?
You’re cooked mate, you server probably shitbed bad
just buy a monitor